Business Plan Pro
Table of Contents
- 1.THEME INSTALL
- 2.MANAGE Plugin
- 3.MANAGE SITE TITLE, LOGO
- 4.MANAGE Post and Page
- 5.MANAGE THEME OPTIONS
- 6.MANAGE STATIC FRONT PAGE
- 7.MANAGE HOME SECTION OPTIONS
- 7.1.MANAGE HOME PAGE SECTIONS
- 7.2.MANAGE SLIDER SECTION SETTING
- 7.3.SECTION ORDER SETTING
- 7.4.MANAGE INTRO SECTION SETTING
- 7.5.MANAGE SERVICE SECTION SETTING
- 7.6.MANAGE LATEST EVENT SECTION SETTING
- 7.7.MANAGE PROMO SECTION SETTING
- 7.8.MANAGE WORK SECTION SETTING
- 7.9.MANAGE COUNTER SECTION SETTING
- 7.10.MANAGE BLOG SECTION SETTING
- 7.11.MANAGE TESTIMONIAL SETTING
- 7.12.MANAGE TEAM SETTING
- 7.13.MANAGE CLIENT SETTING
- 8.MANAGE CONTACT PAGE OPTIONS
- 9.MANAGE ABOUT PAGE OPTIONS
- 10.MANAGE TYPOGRAPHY OPTIONS
- 11.MANAGE MENUS
- 12.MANAGE WIDGETS
- 13.MANAGE THEME AVAILABLE WIDGETS
- 14.MANAGE RESET THEME SETTINGS
- 15.MANAGE ADDITIONAL CSS
After purchase pro version and download your theme from Aarambha Themes you can choose either of the approaches given below to install your theme.
- .Log in to the WordPress Administration Panels.
- Select the Appearance panel, then Themes.
- Select Add New.
- Then select Upload Theme.
- Browse business-plan-pro.zip Theme in your computer.
- Select business-plan-pro.zip and click Install Now.
-
- After theme activation, you will get a notification to activate the plugin.


- Click on Begin installing plugin.
- Install and Activated plugin
-
- Install and active Aarambha Demo Sites plugin.which helps you to import demo data on your site.
- After that, you will found the Import Demo nav in the dashboard.

- Click on Import Demo You will get the available demo.

- choose one demo and import it. you can follow the method shown in this video.
- Go Customize section,then Site Identity.
- From Site Identity, you will be able to add various options related to site identity like:

- Logo: It changes the main logo of the site.
- Site Title: It changes the main site title of the site.
MANAGE Post
-
- Go to Post,Click Add New.
- Add Title,Content,Feature Image and Categories.
- Cick on Publish.

MANAGE Page
- Go to Page,Click Add New.
- Add Title,Content and Feature Image.
- Click on Publish.

-
- Go to Appearance > Customize > Theme Options.
- you will see different sections.

-
- Go to Appearance > Customize > Theme Options > Header Setting.
- Enable Top Header Section: Check on Enable Top Header Section to enable top header on your site.

-
- Choose Option:This option allow you to choose the placement of the search in header.

-
- Choose Option: This option allow you to select the order to display the menu and social icon in the header.

-
- Header Address: This options allow you to enter the header address to display in header.

-
- Phone Number: This options allow you to enter the phone number to display in header.

-
- Contact Email: This options allow you to enter the contact email to display in header.

-
- Enable Social Icon Section: Check on Enable Social Icon Section to enable social icon on your site.

-
- Go to Appearance > Customize > Theme Options > Footer Setting.
- Enable Social Icon Section: Check on Enable Social Icon Section to enable social icon on your site.

-
- Copyright Text: This options allow to write the copyright text for your site.

-
- Powered By Text: This options allow to write the Powered By Text for your site.

-
- Testimonial Section: This options allow to enable Testimonial Section for your site.

-
- Team Section: This options allow to enable Team Section for your site.

-
- Client Section: This options allow to enable Client Section for your site.

-
- Enable in Home Page: Check on Enable in Home Page to enable plugin in home page footer section.

-
- Enable in About Page: Check on Enable in About Page to enable plugin in about us footer section

-
- Go to Appearance > Customize > Theme Options > General Options.
- Layout Options: This option allow you you to choose the layout for pages from three different layout.

-
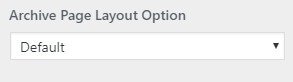
- Archive Page Layout Option:This option allow you to choose the layout for the archive page for your site
-
- Pagination Options: This option allow you to chose the pagination type i.e Default or Numeric.

-
- Enable Posted By: Check on Enable Posted By to disable/enable the posted by option.

-
- Enable Posted Date: Check on Enable Posted Date to disable/enable the posted date.
![]()
-
- Enable Posted Meta: Check on Enable Posted Meta to disable/enable the Posted Meta.

-
- Go to Appearance > Customize > Theme Options >Breadcrum Setting.
- Enable Breadcrumb: Check on Enable Posted Meta to disable/enable the Breadcrumb on your site.

-
- Go to Appearance > Customize >Homepage Settings.
- From Static Front Page, You will be able to set any page as A Static page and you will find Your Latest Posts page option as well.
.

-
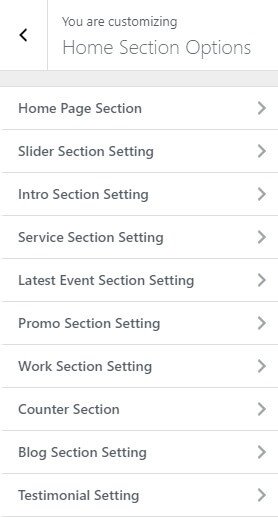
- Go to Appearance > Customize > Home Section Options > Home Page Section.
- Enable Home Page Content: Check on Enable Home Page Content to disable/enable the home page content on your site.
![]()
-
- Go to Appearance > Customize > Home Section Options > Slider Section Setting.
- Enable Slider Section:Check on Enable Slider Section to disable/enable the slider section on your site.
- Select Slider Type:This options allow to select the slider type on your site
- Select Category: This options allow to select the category to display in the slider.
- No of Slider: This option allow to select the number of slider to display.
- Details Button Title:This option allow you to enter Button Title .
- Button URL: This option allow you to enter Button URL.

-
- Go to Appearance > Customize > Home Section Options >Section Order Setting.
- Layout Options: This option allow you to enable different section and also section ordering in Home Page

-
- Go to Appearance > Customize > Home Section Options > Intro Section Setting.
- Intro Title: This option allow you to enter the intro title.
- Select Intro Page: This option allow you to select the page to display in intro section.
- Details Button Title: This option allow you to enter Details Button Title.

-
- Go to Appearance > Customize > Home Section Options > Service Section Setting.
- Service Title: This option allow you to enter the service title.
- Select category: This option allow you to select the category to display in service section.
- Select number for Service: This option allow you to enter no to manage the no of services.

-
- Go to Appearance > Customize > Home Section Options >Latest Event Section Setting
- Latest Event Title: This option allow you to enter the Latest Event title.
- Latest Event Description: This option allow you to enter the Latest Event description.
- Select category: This option allow you to select the category to display in latest event section.
- Latest Event Button Title: This option allow you to enter Latest Event Button Title.

-
- Go to Appearance > Customize > Home Section Options > Promo Section Setting
- Select Promo Page:This option allow you to select the page to display in Promo Section.
- Add Background Image:This option allow you add the image in Promo Section.
- Details Button Title: This option allow you to enter Details Button Title in Promo Section.
- Button Url:This option allow you to enter Button URL.

-
- Go to Appearance > Customize > Home Section Options > Work Section Setting
- Our Work Title: This option allow you to enter the our work title.
- Select category: This option allow you to select the category to display in Our Work section.
- Select number: This option allow you to select the no for the post to display in this section.

- Go to Appearance > Customize > Home Section Options > Counter Section(Note: After activated the Plugin )
- Counter Section: This option allow you to display counter in your Home Page.
-
- Go to Appearance > Customize > Home Section Options > Blog Section Setting
- Blog Title: This option allow you to enter the blog title.
- Blog Description: This option allow you to enter the Latest Event description.
- Select category: This option allow you to select the category to display in Our Work section.
- Select number for Blog: This option allow you to select the no for the post to display in this section.
- Blog Button Title: This option allow you to change the blog button title.

- Go to Appearance > Customize > Home Section Options > Testimonial Setting(Note: After activated the Plugin )
- Testimonial Section: This option allow you to display testimonial in your Home Page.
- Go to Appearance > Customize > Home Section Options > Team Setting(Note: After activated the Plugin )
- Team Section: This option allow you to display Team in your Home Page.
- Go to Appearance > Customize > Home Section Options > Client Setting(Note: After activated the Plugin )
- Client Section: This option allow you to display client in your Home Page.
- Go to Appearance > Customize > Contact Page Options > Contact Page Setting
- location: This option allow you to put the iframe of google map.
- Contact Form Title:This option allow you to change the contact form title.
- Contact Form: You need to enter the contact form short code .
- Icon: This option allow you to enter font awesome class to display the icon .
- Title: This option allow you to enter the title.
- Contact Number: This option allow you to enter the contact Number.
- Contact Email: This option allow you to enter the contact email.
- Contact Address: This option allow you to enter contact address .
- Note: You need to assign the Contact page template to make this section work.
-
- Go to Appearance > Customize > About Page Options
- you will see following setting.

-
- Go to Appearance > Customize > About Page Options > About Page Setting.
- About Service Title: This option allow you to enter about service title .
- Select Category: This option allow you to select the category of your choice to display in this section.
- No of Services : This option allow you to enter the no to manage the number of services to display .
- (Note: You need to assign the About page template to make this section work.)

-
- Go to Appearance > Customize > About Page Options > Theme Tool Box Setting.
- Testimonial Section: This section allow you to display testimonial in about page.
- Team Section:This section allow you to display team section in about page.
- Client Section:This section allow you to display client section in about page.
- Note: You need to assign the About page template to make this section work.

-
- Go to Appearance > Customize > Typography Options.
- You will get following options.

-
- Go to Appearance > Customize > Typography Options > General Color Setting.
- Primary Color:This option allow you to Select the color available in the options.If the preview is fine, click on Publish to apply recently selected Primary color.
- Heading Color:This option allow you to Select the color available in the options.If the preview is fine, click on Publish to apply recently selected Heading color.
- Paragraph Color: This option allow you to Select the color available in the options.If the preview is fine, click on Publish to apply recently selected Paragraph color.
- Hover Color: This option allow you to Select the color available in the options.If the preview is fine, click on Publish to apply recently selected Hover Color.
- Button Color:This option allow you to Select the color available in the options.If the preview is fine, click on Publish to apply recently selected Button Color.
- Post Meta Color:This option allow you to Select the color available in the options.If the preview is fine, click on Publish to apply recently selected Post Meta Color.
- Active Color: This option allow you to Select the color available in the options.If the preview is fine, click on Publish to apply recently selected Active Color.
- Widget List: This option allow you to Select the color available in the options.If the preview is fine, click on Publish to apply recently selected Widget List Color.


-
- Go to Appearance > Customize > Typography Options >Heading Color Setting.
- Menu Color:This option allow you to Select the color available in the options.If the preview is fine, click on Publish to apply recently selected Menu Color.
- Top Background Color:This option allow you to Select the color available in the options.If the preview is fine, click on Publish to apply recently selected Top Background Color.

-
- Go to Appearance > Customize > Typography Options >Home Page Color Setting.
- In this section you will see different color options. Now change the color as per your need.


-
- Go to Appearance > Customize > Typography Options > Footer Color Setting.
- In this section you will see different color options. Now change the color as per your need.

-
- Go to Appearance > Customize > Typography Options > Font Family Setting.
- Select Body Font Family: This option allow you to change the body font in your site.
- Select Menu Font Family: This option allow you to change the Menu Font in your site..
- Select Heading Font Family: This option allow you to change the Heading Font in your site..
- Select Paragraph Font Family: This option allow you to change the Paragraph font in your site..
- Publish and refresh the page to see the font being reset.


-
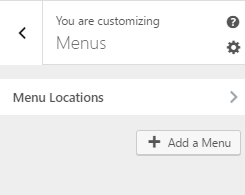
- Go to Appearance > Customize > Menus > Main Menu.
- click “Add a Menu” button and you will be able to create a menu.
- click Add Items and you will be able to Add or Remove Menu Items according to your requirement.
- Select the Menu locations.
- Save the changes by clicking on publish button.
-
- Go to Appearance > Customize > Menus >View All Locations.
- Primary: This option allow you to Select the menu for Primary Menu. Primary menu appears as a main menu in header section.
- Social Menu:This option allow you to Choose the Social Menu, which shows the social links title as a menu.
- Top Menu:Select the menu for Top Menu. Top Header menu appears on the top header section section.

-
- Go to Appearance > Customize > Widgets.
- you will see different sections to add widget where you will be able to Add a Widget or Remove widgets by going to particular widget section
- added widget will be displayed in particular section that you have added.


-
- Go to Appearance > Widgets.
- Business Plan:Recent Posts:You will find options and settings in this widget. Now setup the widget according to your need.

-
- Go to Appearance > Customize >Reset All Settings.
- Check to reset all settings: This option reset all the theme settings and resets all the color settings to the default values along with custom header and background will be reset to default.Note: Refresh the page after save to view full effects.

